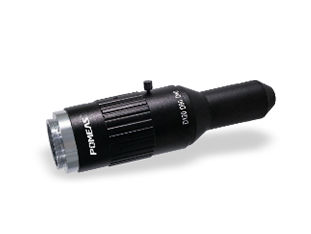
In the field of industrial inspection, 360° inspection lenses have become a key tool for enhancing inspection efficiency and precision due to their ability to capture object details from all angles. However, faced with the vast array of lens products on the market, how to make precise selections has become a focal point for enterprises.


I. Resolution: Matches detection accuracy to prevent “fuzzy misjudgments.”
Resolution is the core metric for lens imaging clarity, directly impacting a detection system's ability to identify minute defects. In 360° inspection, resolution must precisely match the smallest feature size of the target object. For instance, when inspecting 0.1mm characters on a medicine bottle surface, the lens resolution must reach a level capable of clearly distinguishing objects of this size (typically requiring ≥5 million pixels). Insufficient resolution may cause blurred character edges, missed scratches, and other issues, directly impacting product quality.
Tips to Avoid Pitfalls:
-
Formula Calculation: Based on detection accuracy (e.g., 0.05mm/pixel) and field of view (e.g., 50mm × 50mm), calculate the required resolution: Resolution (pixels) = Detection Accuracy (mm/pixel) × Field of View (mm) = 0.05 × 50 = 10 million pixels
II. Focal Length and Field of View: Balancing Detection Range and Image Quality
Focal length determines imaging distance and field of view, while the field of view angle (FOV) reflects the coverage range captured by a single lens shot. For 360° inspection, select an appropriate combination based on product dimensions and inspection requirements:
1. Interior wall inspection: For small hollow objects like bottle caps or screws, a short focal length lens (e.g., 8mm) is required to capture clear images within confined spaces.
2. Outer wall inspection: For large items like medicine bottles or batteries, a long focal length lens (e.g., 16mm) combined with a wide-angle FOV (≥120°) is needed to ensure the entire circumferential surface is included in the inspection field of view.
3. Distortion control: Excessively wide FOVs may cause edge image distortion; select lenses with distortion rates <0.5%.
Tips to Avoid Pitfalls:
-
Formula Assistant: Calculate Field of View using Working Distance (WD), Focal Length (f), and Sensor Size (CCD): FOV = f CCD Size × WD
III. Working Distance: A Key Constraint for Stable Imaging
Working distance refers to the distance from the front of the lens to the surface of the object being inspected, directly affecting the stability and imaging quality of the inspection system. In 360° inspection, key considerations include:
- Internal Wall Inspection: The lens must penetrate deep into the cavity, with working distance constrained by object dimensions (e.g., bottle cap inner diameter of only 10mm). Ultra-compact lenses (e.g., working distance <15mm) must be selected.
- External Wall Inspection: Production line conveyance methods must be considered (e.g., conveyor belt vibration, object positional shifts).
- Mechanical Compatibility: Lens weight and mount type (e.g., C/CS mount) must match the camera to prevent optical axis misalignment caused by vibration.
Tips to Avoid Pitfalls:
- Spatial Simulation: Simulate the relative position between the lens and objects within a 3D model to ensure adjustable and stable working distance.
- Dynamic Testing: Test the lens's vibration resistance on high-speed production lines (e.g., cycle time < 2 seconds per piece) to prevent image blurring.
IV. Comprehensive Selection: A Four-Step Approach from Requirements to Implementation
- Define Requirements: List key parameters such as inspection targets (e.g., scratches on bottle cap inner walls), minimum defect size (e.g., 0.05mm), and production cycle time (e.g., 1.8 seconds per piece).
- Parameter Matching: Calculate theoretical values using resolution, focal length, and working distance formulas to screen eligible lens models.
- Field Validation: Test lens imaging quality, distortion rate, vibration resistance, and other metrics on simulated or actual production lines.
- Cost Optimization: Prioritize mature, cost-effective brands that meet requirements (e.g., POMEAS 360° inspection lenses supporting multi-industry applications with ±0.05mm accuracy).
Product recommendation
TECHNICAL SOLUTION
MORE+You may also be interested in the following information
FREE CONSULTING SERVICE
Let’s help you to find the right solution for your project!


 ASK POMEAS
  PRICE INQUIRY
  REQUEST DEMO/TEST
  FREE TRIAL UNIT
  ACCURATE SELECTION
  ADDRESS
 Tel:+ 86-0769-2266 0867
 Fax:+ 86-0769-2266 0867
 E-mail:marketing@pomeas.com
