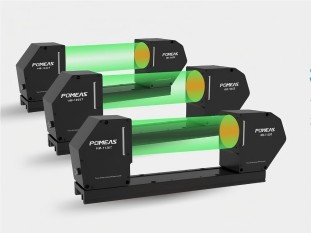
Advantages and disadvantages of on-line projected image measuring instruments
Are you looking for an efficient, precise and non-contact industrial measurement solution? With its unique optical projection and image processing technology, the in-line projected image measuring instrument is becoming an important tool in modern manufacturing and R&D. However, understanding its core strengths and potential limitations will make it a true “eye” for quality control. However, it is important to understand its core strengths and potential limitations so that it can truly be your “eye” for quality control.


Strengths: A Model of Efficiency and Precision
1. Efficient and fast: automated measurement process greatly compresses the inspection time, especially suitable for high-throughput in-line inspection of batch products, significantly improving the efficiency of the production line.
2. Non-contact measurement: The optical imaging principle ensures zero contact during the measurement process, which perfectly protects workpieces that are easily deformed, ultra-thin, or made of delicate materials (e.g., silicon wafers, flexible circuit boards), and avoids the damage that may be caused by traditional contact probes.
3. High precision and repeatability measurement: Precision optical lens and advanced image algorithms combine to easily achieve micron-level measurement accuracy, and repeatable measurement results are stable and reliable, providing a solid data base for quality control.
4. Convenient operation: real-time projection image clearly presents the outline of the object to be measured and the measurement process, friendly interface, the operator is easy to grasp the core measurement steps.
5. Rich data and reports: the system automatically records and stores measurement data, and generates diversified statistical charts and detailed reports (e.g. CPK analysis) with a single click, which facilitates quality traceability and process improvement.
The Challenge: Constraints on Superior Performance
1. Higher initial investment cost: Compared with basic measurement tools, high-performance hardware (precision lenses, high-resolution cameras) and specialized software increase the acquisition cost significantly.
2. Stringent environmental requirements: Measurement accuracy is extremely sensitive to the environment. Environmental vibration, temperature fluctuations, ambient light interference (need to operate in a dark room or a shaded environment) and airborne dust can have a significant impact on the imaging quality and results.
3. Deep dependence on software and algorithms: Measurement accuracy and reliability are highly dependent on the strengths and weaknesses of core algorithms such as edge extraction, focusing, image matching, etc. The performance of software directly determines the capability of the device. Software performance directly determines the ceiling of the device's capability.
4. Measurement dimension and the limitations of complex structures: mainly specializes in two-dimensional contour dimensions and precision measurement of surface features. For deep grooves, complex cavities, steep sidewalls or objects that require precise 3D coordinates (such as complex surfaces), their measurement capabilities are limited or require special configurations.
5. Operator expertise is still required: Despite the relative simplicity of the operation, calibration of the equipment, proper setup of the measurement program, interpretation of complex results and basic maintenance require a certain degree of professionalism on the part of the operator.
In-line projected image measurement is a powerful tool for efficient, non-destructive precision measurement. However, their performance comes with real-world considerations such as cost, environmental requirements and dimensional constraints. Before you make your choice, think about this: What dimensions are your core measurement needs centered on? How stable is the production environment? Does the budget range match? Are the characteristics of the part to be measured (size, material, complexity) within its capability range?
Only by accurately matching the advantages of the equipment with the contours of your actual needs, can you find a pair of eyes that can really “see clearly and reliably” for quality control. Do you have a clearer comparison dimension in mind?
Product recommendation
TECHNICAL SOLUTION
MORE+You may also be interested in the following information
FREE CONSULTING SERVICE
Let’s help you to find the right solution for your project!


 ASK POMEAS
  PRICE INQUIRY
  REQUEST DEMO/TEST
  FREE TRIAL UNIT
  ACCURATE SELECTION
  ADDRESS
 Tel:+ 86-0769-2266 0867
 Fax:+ 86-0769-2266 0867
 E-mail:marketing@pomeas.com
