


In visual inspection, the light source is often a more decisive factor than the camera. Even for the same workpiece, different lighting set-ups can produce vastly different results. Let’s first take a quick look at the common types: ring lighting, strip lighting, backlighting, coaxial lighting, dome lighting, point light sources, as well as UV lighting and line scanning, amongst others. Below, we’ll examine the differences in their performance in practical applications.

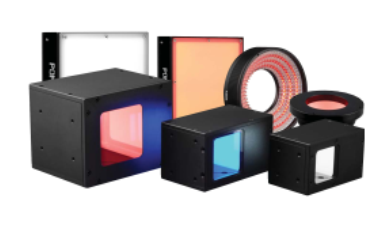
Ring lighting is the most common type, providing illumination from multiple angles. When inspecting embossed characters on metal parts, low-angle ring lighting is used; the oblique light casts shadows, making the characters appear clearly defined in black and white. However, if the part has a mirror-like finish, the centre is prone to overexposure.
Linear lighting offers flexible directional control; it is often directed from both sides at low angles, enabling it to ‘bring out’ subtle surface irregularities. For example, scratches on a mobile phone’s glass cover, which are difficult to discern with the naked eye, immediately appear as bright lines when illuminated with a line light at a glancing angle, offering extremely high contrast; this method is suitable for large, flat surfaces.
Backlighting is specifically designed for contour and dimensional inspection. As the object being inspected blocks the uniform backlight, internal details disappear, leaving only sharp, dark edges; this method offers extremely high precision when measuring the length, width and hole diameters of precision components, but surface defects are completely obscured.
Coaxial light is directed vertically, with the lens capturing only vertical reflections. Smooth, mirror-like surfaces reflect strongly, appearing bright white; whereas dirt, scratches and other sources of scattered light are blocked, resulting in dark spots. When inspecting mirror-finished wafers, fingerprints on glass or scratches on highly reflective metals, coaxial light leaves defects nowhere to hide, whilst keeping the background clean.
Dome lighting utilises hemispherical diffuse reflection, enveloping the object in uniform light with virtually no shadows. Take blister-packed medicines, for example: the curved plastic casing can cause glare with ring-shaped lighting, whereas dome lighting illuminates the surface evenly, clearly distinguishing colour variations. It is suitable for uneven surfaces and highly reflective mixed materials, highlighting colour information.
When selecting a model, bear in mind a few key points.

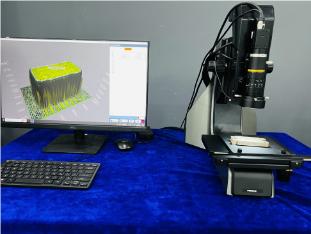
First, consider the material: for metallic mirror surfaces, prioritise coaxial or dome lighting to avoid glare; for matt plastic, use ring or strip lighting to highlight the texture; for transparent materials, backlighting is often used to view contours, or light at specific angles to inspect for internal foreign objects; fluorescent substances should be excited using ultraviolet light.
Second, consider the contrast between features and the background: to locate black spots on white plastic, standard annular illumination is sufficient; for scratches on metal, test linear illumination from multiple angles to find the direction that makes the scratches most prominent.
Third, consider the illumination mode: in bright-field mode, defects often appear dark, making it suitable for flat defects; in dark-field mode, defects appear brighter due to scattering, making it suitable for subtle irregularities; low-angle illumination creates a dark-field effect, whilst coaxial illumination produces a bright-field effect.
Fourth, consider the environment: in confined spaces, use an integrated ring light assembly; for high-speed motion, use high-brightness stroboscopic or line-scan lighting; and apply filters to mitigate ambient light interference.
Note: It is essential to carry out repeated tests using actual samples. There is no such thing as a universal light source; trying a different angle or adding another polarising filter can make a world of difference. The essence of selecting a light source is to bring out hidden features and sharpen blurred edges. Once you grasp this principle, three minutes will be enough to take you from being completely in the dark to feeling fully confident.
Product recommendation
TECHNICAL SOLUTION
MORE+You may also be interested in the following information
FREE CONSULTING SERVICE
Let’s help you to find the right solution for your project!
 ASK POMEAS
  PRICE INQUIRY
  REQUEST DEMO/TEST
  FREE TRIAL UNIT
  ACCURATE SELECTION
- APPICATION CASE
- RESOURCE CENTER
- DOWNLOAD CENTER
SOLUTIONS SUPPORT
- ZOOM LENS SELECTION TOOL
- TELECENTRIC LENS SELECTION TOOL
- FA LENS SELECTION TOOL
- ZOOM RATIO TABLE
- CERTIFIED MODEL
SELECTION TOOL
- WHY POMEAS
- FAQ
- PRIVACY POLICY
- TERMS OF USE
- DELIVERY & RETURN POLICY
CUSTOMER CARE
 ADDRESS
Add.:No.68, Yongwei Road, Baizhoubian, Dongcheng District, Dongguan, China,523000
CONTACT
 Tel:+ 86-0769-2266 0867
 Fax:+ 86-0769-2266 0867
 E-mail:marketing@pomeas.com

Wechat QR code

Software Copyright :2021SR0176001 抄袭必究, 技术支持:誉新源科技