


When choosing a ZOOM LENS, many people focus solely on the zoom range and resolution, whilst overlooking a key accessory that can take a lens to the next level—add-on lenses. Used correctly, a single lens can do the work of three; used incorrectly, you’ll be wasting your money and causing yourself trouble. Today, we’ll cover everything you need to know.

I. What is an additional lens?
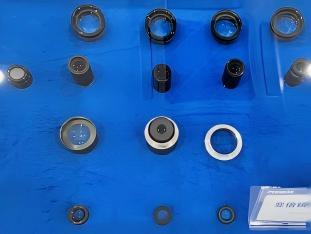
Add-on lenses are, essentially, a set of additional lenses mounted in front of or behind the main lens, used to alter the lens’s focal length, field of view and optical performance without having to replace the entire lens.
Depending on their mounting position and function, mainstream add-on lenses fall into two main categories:
Rear-mounted type — Teleconverter (magnification converter)
Mounted between the camera and the lens, it is designed with a negative dioptre correction, enabling the focal length to be multiplied. For example, a 50mm lens fitted with a 2x teleconverter results in an equivalent focal length of 100mm. A set of lenses with different focal lengths, when paired with a teleconverter, is effectively equivalent to having an additional set of lenses, instantly doubling the range of use.
Front-Mounted Type — Close-up Lens (Half-Length Lens)
This is generally a positive lens with a relatively long focal length, mounted in front of the main lens. It shortens the focal length of the combined optical system, allowing the lens to focus at a closer subject distance, thereby magnifying the image. A lens that was originally only capable of capturing full-length portraits can, when fitted with a close-up lens, capture half-length close-ups; hence it is also known as a ‘half-length lens’.
In addition, there are special-purpose lenses such as wide-angle converters (which shorten the focal length and increase the angle of view), polarising filters (which eliminate reflections and enhance contrast), and colour filters (which allow specific wavelengths to pass through).
II. How the auxiliary lens works
Use a combination of lenses to alter the equivalent focal length of the entire optical system.
1. The principle of a teleconverter:
A teleconverter is a group of negative-power lenses. When mounted between the camera body and the lens, it causes the light entering the main lens to first diverge and then converge, effectively increasing the image distance of the main lens. According to the lens imaging formula, an increase in image distance → an increase in equivalent focal length → an increase in magnification. The trade-off is clear: whilst the aperture remains unchanged, the focal length increases, resulting in a reduction in the relative aperture (D/f) and a decrease in light transmission. Image quality is also compromised to some extent; therefore, exposure compensation is essential when using a teleconverter—either by opening the aperture or extending the exposure time. A 2x teleconverter typically reduces the maximum aperture by approximately two stops, whilst a 3x teleconverter reduces it by approximately three stops.
2. Principle of close-up lenses:
A close-up lens is a positive lens; when mounted in front of the main lens, it effectively ‘pre-adds a converging element’ to the entire system. The focal length of the combined optical system is shorter than that of the original lens, thereby enabling focus at closer subject distances and resulting in a larger image.
3. Principle of adjustable auxiliary lenses (exclusive to ZOOM LENSes):

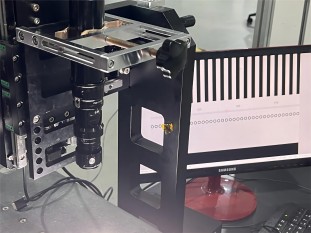
This is an advanced technique designed specifically for ZOOM LENSES. By utilising its own adjustment mechanism, it alters the distance between the auxiliary lens and the main lens, thereby changing the equivalent working distance of the entire lens system. Even if the test object remains completely stationary, the ZOOM LENS can be optimised for the best possible image quality by adjusting the auxiliary lens—a feature that is nothing short of a lifesaver in inspection scenarios where the working distance is fixed and space is limited.
III. Applications of auxiliary lenses in visual inspection
Scenario 1: Inspection of large-sized workpieces — increasing working distance and avoiding interference
When inspecting large-sized products such as PCBs, display screens and metal sheets, placing the lens too close to the object can easily result in obstruction or even collision. By fitting a teleconverter, the equivalent focal length is extended and the working distance increases accordingly, allowing the lens to capture images from a safer position and completely avoid the risk of interference.
Scenario 2: High-Magnification Micro-Defect Inspection — Cost-Effective Magnification Boost
Some defect inspections require extremely high magnification, yet the native magnification range of ZOOM LENSES is limited. Rather than spending a fortune on a higher-magnification lens, simply adding a teleconverter allows you to further increase the system’s magnification without changing the lens, effectively halving hardware costs. For example, a 12.5X ZOOM LENS paired with a teleconverter can easily meet higher magnification requirements, enabling precision inspection of micro-gear tooth profile errors at the ±0.005 mm level.
Scenario 3: Close-up shots – the domain of close-focus lenses
In the inspection of electronic components, when it is necessary to examine the solder joint details of 0201-package resistors and capacitors, or to observe cellular structures and microscopic defects in materials, close-focus lenses enable the lens to focus at extremely short working distances, magnifying minute features to a level that the sensor can resolve.
Scenario 4: Compact Multi-Camera Layout — Flexible Focus Adjustment
On production lines utilising side-by-side multi-camera inspection, installation space is at a premium. By fitting different magnification attachments to different cameras, each lens can be set to its optimal working distance and magnification without adjusting the camera positions, ensuring they do not interfere with one another.
Scenario 5: Coordination of Specialised Light Sources — Polarising Filters and Colour Filters
When inspecting reflective metal surfaces, polarising filters eliminate stray reflections, ensuring that surface scratches and defects are fully exposed; colour filters, meanwhile, selectively transmit light of specific wavelengths, enhancing contrast during the inspection of products with minimal colour differences and leaving no room for defective items to go undetected.
Product recommendation
TECHNICAL SOLUTION
MORE+You may also be interested in the following information
FREE CONSULTING SERVICE
Let’s help you to find the right solution for your project!
 ASK POMEAS
  PRICE INQUIRY
  REQUEST DEMO/TEST
  FREE TRIAL UNIT
  ACCURATE SELECTION
- APPICATION CASE
- RESOURCE CENTER
- DOWNLOAD CENTER
SOLUTIONS SUPPORT
- ZOOM LENS SELECTION TOOL
- TELECENTRIC LENS SELECTION TOOL
- FA LENS SELECTION TOOL
- ZOOM RATIO TABLE
- CERTIFIED MODEL
SELECTION TOOL
- WHY POMEAS
- FAQ
- PRIVACY POLICY
- TERMS OF USE
- DELIVERY & RETURN POLICY
CUSTOMER CARE
 ADDRESS
Add.:No.68, Yongwei Road, Baizhoubian, Dongcheng District, Dongguan, China,523000
CONTACT
 Tel:+ 86-0769-2266 0867
 Fax:+ 86-0769-2266 0867
 E-mail:marketing@pomeas.com

Wechat QR code

Software Copyright :2021SR0176001 抄袭必究, 技术支持:誉新源科技